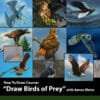
Aaron thanks you for buying the course and explains general information about the topics you will review.
How to Draw Birds of Prey with Aaron Blaise

Lessons
02 Birds of Prey Anatomy Heads
Study the rhythms of the bird of prey head and the parts on it: maxilla, cere, eye, lower eyelid, nictitating membranes, lore, crown, forehead, ear, mouth, nape, and neck.
03 Basic Body
Examine the bird skeleton, then build the body in different positions recognizing its parts, using the human body analogy.
04 Feet
Know the digitigrade characteristics of this group of birds to represent the feet more properly.
05 Wing Anatomy
Identify different forms of wings; study the bones, muscles, and positions.
06 Animation Lesson: Flight Mechanics
Learn the importance of representing the movement with this motion analysis, through an animation.
07 Bald Eagle Heads – Profile View
Focus your study on the bald eagle head, identifying colors to express shades and lights.
08 Bald Eagle Heads – Front View
Continue studying the bald eagle’s head, from the front. Learn how to create the illusion of feathers using shadows.
09 Bald Eagle Heads – 3/4 View
Recapitulate how much the feathers build out the bald eagle shape with the three-quarter view.
10 Bald Eagle Body
Complete your study of the bald eagle while reaffirming the position of the feathers in a body in flight.
11 Harpy Eagle Head – Profile View
Reiterate reference points for bird heads as you learn about the harpy eagle features.
12 Harpy Eagle Heads – Front view
Take a close look at how the feathers shape the harpy eagle’s head in this front view.
13 Harpy Eagle Heads – 3/4 view
Dress the 3/4 view of the head with the characteristic fluffy feathers of the harpy eagle.
14 Harpy Eagle Body
Practice your bird drawing with the peculiarities of the harpy eagle’s body.
15 Andean Condor Head – Profile View
Know in detail the profile view of the largest bird of prey in the world. Use the Photoshop brush included, or imitate the effect in traditional media, to create fur texture.
16 Andean Condor Head – Front View
Meet the skull front view and reference points for the Andean condor.
17 Andean Condor Head – 3/4 View
Complete the study of the Andean Condor head and learn how to create a brush in Photoshop to simulate the texture in the dark red caruncle or comb.
18 Andean Condor Body
Paint a complete Andean Condor and use chiaroscuro to express the texture of the feathers.
19 Peregrine Falcon Head – Profile View
Take the skull as a reference to draw the Peregrine Falcon head profile view.
20 Peregrine Falcon Head – Front View
Continue studying the Peregrine Falcon Head, his points of reference, and color patterns.
21 Peregrine Falcon Head – 3/4 View
Use the skull as a reference to locate properly the cere, eyes, and feathers.
22 Peregrine Falcon Body
Express in your Peregrine Falcon a movement feeling and the influence of the colors of the environment on its body.
23 Red Tailed Hawk Head – Profile View
Learn particularities about the name Red Tailed Hawk, their base colors, and feather style.
24 Red Tailed Hawk Head – Front View
Apply the methodology of drawing from the skull and learn the most common markings for the Red Tailed Hawk head.
25 Red Tailed Hawk Head – 3/4 View
Complete the study of the Red Tailed Hawk head.
26 Red Tailed Hawk Body
Paint the complete body from a loose sketch to detail the feathers.
27 Swallow Tailed Kite Heads
Study the head and the volume of the feathers, from different angles.
28 Swallow Tailed Kite Body
Paint a Swallow Tailed Kite flying and create a brush in Photoshop to achieve the feather texture.
29 Everglade Snail Kite Heads
Study the three head angles and colors of this Florida bird.
30 Everglade Snail Kite Body
Use shades and light to represent different types of feathers over the body in movement.
31 Stellers Sea Eagle Head – Profile View
Study the profile head of this eagle, and add shadows and lights to reach the depth of the feathers.
32 Stellers Sea Eagle Head – Front View
Detail the interior of an open beak in this study of the front view head.
33 Stellers Sea Eagle Body
Follow the development of a complete composition with a flying Stellers Sea Eagle.
34 Golden Eagle Head – Profile View
Use a skull picture as a base to paint a Golden Eagle head profile view. Then, build the colors to obtain feather texture.
35 Golden Eagle Head – Front View
Continue the study of the head, and paint a front-on shot. Work in the shades to represent the volume of the head.
36 Golden Eagle Head – 3/4 View
Finish your view of the head and do the three-quarter view.
37 Golden Eagle Body
Follow Aaron working on a complete composition about the environment of the Golden Eagle.
38 Osprey Head – Profile View
Use a skull picture to paint the Osprey head profile view more accurately; express the feathers with a few lines then add color.
39 Osprey Head – Front View
Continue with the front view of the head and cast shadows with a side light source.
39-B Osprey Head – 3/4 View
Follow this exercise to achieve the 3/4 view of the head, highlighting the characteristic feathers of the Osprey.
40 Osprey Body
Aaron points out the importance of knowing the osprey´s anatomy in advance and analyzing your reference photos while creating a full-body composition.
41 Great Horned Owl Head – Front View
Use the Great Owl’s crane as a reference to draw the head and the proportion of the eyes. Learn how to create a Photoshop brush, to simulate the feather fluff.
42 Great Horned Owl Head – Profile View
Learn the proportions of the owl in the profile view. Work carefully to achieve the feathers’ texture.
43 Great Horned Owl Head – 3/4 View
Concludes the study of the Great Hornet Owl’s head.
44 Great Horned Owl Body
Plan a composition with a full-body Great Hornet Owl, learning how you can use your reference photos.
45 Barn Owl Head – Front View
Start the Barn Owl head study with the front view.
46 Barn Owl Head – Profile View
Use the skull as a reference to learn the proportions of the Barn Owl in the profile view.
47 Barn Owl Head – 3/4 View
Find the anchor points to draw a Barn Owl head in a 3/4 view. Reiterate how to represent the texture of the feathers without drawing them one by one.
48 Barn Owl Body
Follow Aaron as he paints a full-body Barn Owl, creating the impression of movement in flight in the dark.
49 Ferruginous Hawk Head – Profile View
Explore the shapes of the Ferruginous Hawk head, then add colors and textures.
50 Ferruginous Hawk Head – Front View
Draw the front view of the Ferruginous Hawk, based on a general outline, identifying the patterns for this bird of prey.
51 Ferruginous Hawk Head – 3/4 View
Complete the head study of the Ferruginous Hawk.
52 Ferruginous Hawk Body
Draw the Ferruginous Hawk body, applying what you have learned about the anatomy of the wings, and texture of the feathers, while you learn about the markings of this bird.
53 Northern Goshawk – Profile View
Start your study of the Northern Goshawk head. If you follow the exercise in Photoshop, learn the step-by-step to create a brush to simulate their streaking vermiculation pattern.
54 Northern Goshawk – Front View
Draw from scratch the front view of the Northern Goshawk, and add colors and shades to achieve the volume and patterns.
55 Northern Goshawk – 3/4 View
Follow this exercise to get the Northern Goshawk 3/4 view.
56 Northern Goshawk Body
Learn the importance of the sketch before your final composition. See how to create the feeling of movement in your composition, in this case, with filters in Photoshop.
57 Gyrfalcon Head – Profile View
Start the study of this Artic bird of prey.
58 Gyrfalcon Head – Front View
Continue the study of the head, paint a front view and work in the shades to represent the poofy feathers.
59 Gyrfalcon Head – 3/4 View
Complete the three views of the head for the Gyrfalcon.
60 Gyrfalcon Body
Use the reference photo included in the bonus materials to draw a full body Gyrfalcon, take your time to achieve the pattern.
61 The End
Aaron thanks you for selecting this course. Share your artwork with #CreatureArtTeacher
